


Wie ich mein Collagematerial aufbewahre (und warum das für mich funktioniert)
Eine der Fragen, die mir am häufigsten gestellt wird, lautet:
„Wie bewahrst du all dein Collagematerial auf?“
Hast du ein bestimmtes System? Sortierst du nach Größe, Farbe oder Thema?
Meine Antwort: ja, ja und ja. 😊
Das klingt vielleicht nach Chaos, aber mit der Zeit habe ich eine Methode entwickelt, die für mich richtig gut funktioniert. Und vielleicht ist ja auch etwas dabei, das für dich hilfreich ist.
Hier kommt ein kleiner Blick hinter die Kulissen, wie ich mein Collagematerial organisiere.
Boxen nach Größe
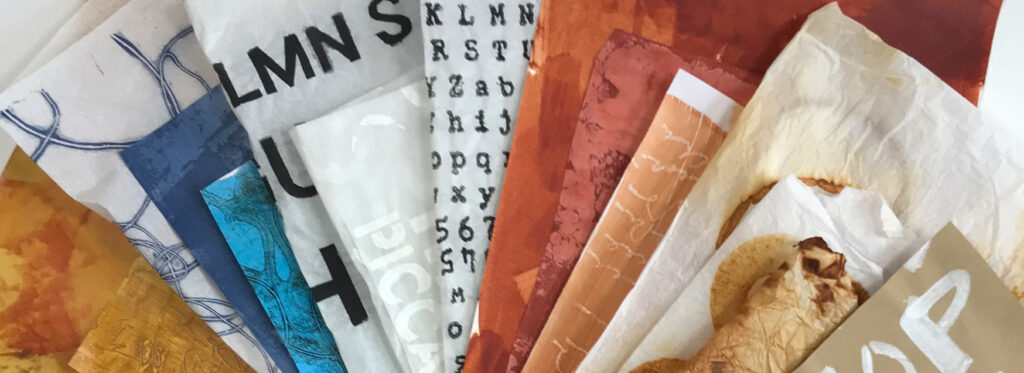
Die meisten meiner Papiere bewahre ich in Boxen auf, sortiert nach ähnlichen Formaten.
Oft handelt es sich um Papiere, die ich selbst bemalt, bedruckt oder dekoriert habe.
Der große Vorteil an dieser Methode: Ich kann schnell durchblättern und finde genau das, was ich gerade für eine Collage brauche.
Kleine Boxen nach Farbe
Dann gibt es noch die kleinen Teile – Reste, Fragmente oder winzige Schnipsel aus früheren Projekten.
Diese sortiere ich nach Farben in kleinen Boxen.
Wenn ich bei einer Collage zum Beispiel einen kleinen roten Akzent brauche, greife ich zur roten Box – und finde fast immer genau das Richtige.
Holztabletts für große Bögen
Mit der Größe meiner Collagen ist auch das Papier gewachsen, das ich verwende.
Größere bemalte oder bedruckte Bögen lagere ich mittlerweile auf flachen Holztabletts unter meinem Arbeitstisch.
Früher habe ich sie stehend in großen Boxen aufbewahrt, aber ab A4 werden diese Boxen zu sperrig und nehmen zu viel Platz ein.
Die Tabletts sind flach, leicht herauszuziehen und gerade tief genug, um größere Papierstapel farblich sortiert zu lagern – perfekt zum Durchblättern.
Ich nutze sie auch für bedrucktes Seidenpapier, das so flach liegen kann, ohne zu knittern.
Projekt-Tabletts – stapelbar und praktisch
Für laufende Projekte verwende ich einfache Plastiktabletts, in denen ich alle zugehörigen Materialien zusammen aufbewahre.
Da ich oft an mehreren Stücken gleichzeitig arbeite, hilft mir das, den Überblick zu behalten.
Ich kann die Tabletts stapeln, beiseite stellen und meinen Arbeitstisch bei Bedarf sofort freiräumen.
Seidenpapier an der Wand
Noch ein letzter Tipp: Sehr große Bögen Seidenpapier, vor allem für Rostdruck, klammere ich zusammen und hänge sie an die Wand.
So kann ich sie bequem durchblättern – und sie bleiben glatt und ohne Falten.
Es gibt nicht den einen richtigen Weg
Das ist einfach das System, das für mich funktioniert.
Vielleicht sieht deine Lösung ganz anders aus – und das ist völlig in Ordnung.
Wichtig ist: Finde heraus, was für deinen Raum, dein Material und deine Arbeitsweise am besten funktioniert.
Probiere aus. Passe an. Finde deine eigene Methode.
Möchtest du dein eigenes Collagematerial herstellen?
Viele der Papiere, die ich verwende und aufbewahre, habe ich selbst gestaltet – und genau das liebe ich besonders.
Warum? Weil selbstgemachtes Collagematerial dir Kontrolle und kreative Freiheit gibt.
Für mich sind das die drei größten Vorteile:
Individualität: Ich kann genau das Papiergewicht wählen, das ich mag – nicht zu dick, nicht zu dünn.
Flexibilität: Ich kann Papiere in genau der Farbharmonie gestalten, die ich gerade brauche.
Einzigartigkeit: Niemand sonst hat genau diese Strukturen, Farben oder Spuren. Alles ist handgemacht – und das macht meine Collagen persönlicher und unverwechselbar.
Wenn du Lust hast, deine eigene Sammlung an Collagepapieren zu gestalten, schau dir meinen Onlinekurs an:
👉 Create Unique Collage Papers
Der Kurs steckt voller spielerischer Techniken, einfacher Werkzeuge und Inspirationen – damit du dir dein ganz persönliches Papierarchiv anlegen kannst.
Nur bis Sonntag (20.7.2025) bekommst du 30 % Rabatt mit dem Code “SummerFun”.
Lass das Papierspiel beginnen!